Image Map

Thursday, June 30, 2022

Monthly Media Center Reports

I am definitely NOT ready for August yet, but that doesn't mean that I'm not already planning ahead. As soon as my new Big Happy Planner and sticker arrived I got to work adding everything school related to my calendar.


If you haven't tried {these} erasable markers yet, you have GOT to! 

Seriously, go add them to your Amazon cart now. You will be so glad you did.


Once I got my planner organized I started to think about school...sigh!!!  I wanted a monthly document I could add to my planner that gave detailed information about circulation, weeding, popular titles, purchases and new books/series that I added to the collection. So, I set to work and created this easy to print document that you can add to your calendar/lesson plan book to keep track of everything library related.


Click {here} to view this product in my TpT store.

Each month features a two page layout. I am planning to print mine double sided on cardstock and add them to each month in my planner.


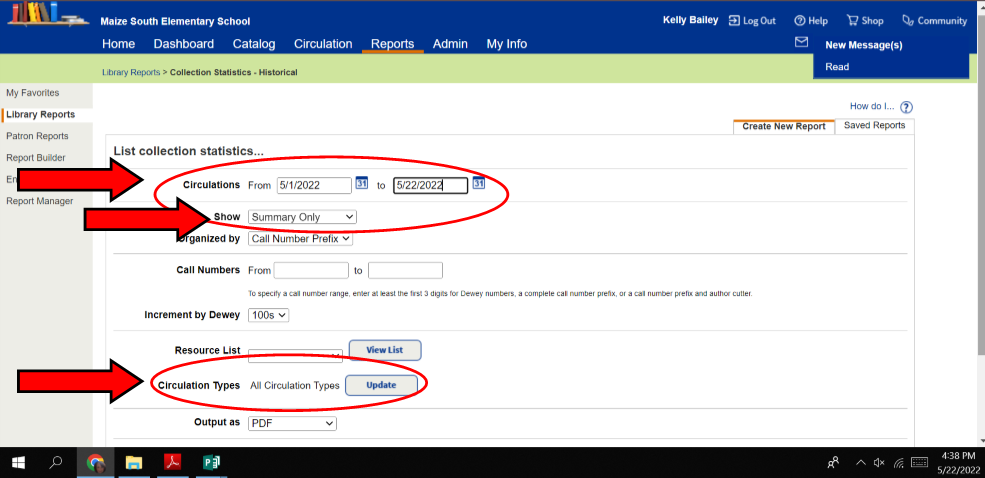
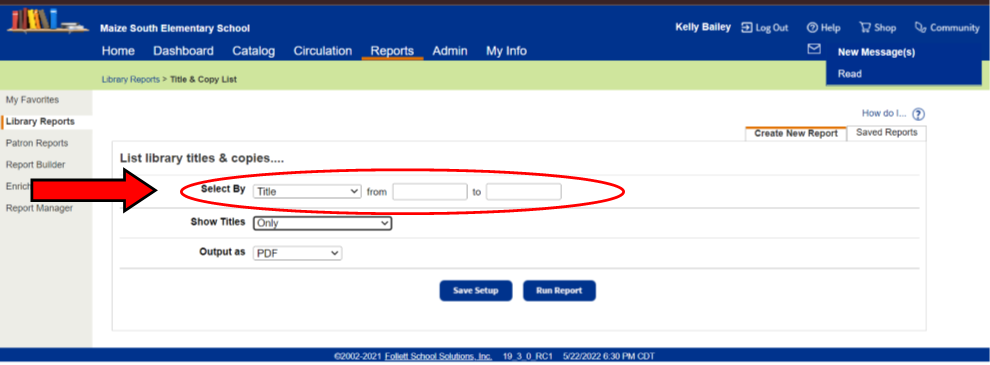
You can document the following information each month:

- total # circulations
- # copies weeded
- top 5 circulated books
- orders placed
- miscellaneous notes

I hope that many of you will find this little tool helpful. I think it will be a great resource to share with administrators throughout the year regarding the activity in your library.

Happy Planning!!!!!

Friday, June 10, 2022

HOW TO - Creating Sublocations in Destiny

I have received several emails from people wanting to get more information about how I created sublocations for books once I {sort of} ditched Dewey and reorganized my nonfiction sections into subjects. So, I will do my best to try to walk you through it step by step.

STEP 1: Locate the book in Destiny by scanning the barcode and click on {AVAILABLE} in the Status Column.


STEP 2: Click on {EDIT COPY}


STEP 3: Scroll down until you come to the sublocation heading and click on {OTHER}


You will have to do this for the first book in any new sublocation. This allows you to create the sublocation name. Once you have done this, you should be able to just search for the sublocation by clicking on the down arrow by the {SUBLOCATION HEADING BOX}.

STEP 4: Add the title of the sublocation and click on {SAVE}.


STEP 5: Click on {SAVE COPY] if you see the correct sublocation listed.


Now when students are searching for a book they want to check-out using Destiny Discover here is what they will see. Notice that under the Call Number they can also see the Sublocation.


I opted to just leave the Call Numbers as is. I did not add any additional stickers or labels to any of the books that I put into new sublocations. I am fortunate to have TWO full time library aids that do all of my shelving. They played an active role in helping me with this HUGE project. They didn't think shelving books in the new locations would be an issue.

Hopefully that was all as clear as mud . . . lol! Learning to navigate and use Destiny is still a work in progress for me. A lot of times I figure things out by trial and error.

Wednesday, June 8, 2022

Extreme Makeover - Shelf Edition


I finally found time to tackle a project that has been on my TO DO LIST for the past three years. I was beginning to wonder if I was ever going to get it. 

After completing our end of the year inventory and weeding several titles from the collection, I gave my EASY - NONFICTION section a complete makeover.


I started by ordering 25 of {these}buckets from Walmart.  They are heavy duty and fairly wide so they worked perfectly for the oversized books.

Next, I set to work dividing books into preliminary categories. I will admit, this part probably took the longest. As you can see there were some random titles that didn't really fit into any specific categories so I left them on the top shelf and just kept them organized by their call numbers.

It was important to me that everything be kept organized in Destiny so I created sublocations for each category and updated the title info. This alone was a BIG project . . . but I think it will be helpful in the long run when students/teachers are trying to locate a specific book. 

Once I had all of my category names I started making labels for the buckets. I went ahead and put labels on 2 sides of each bucket. This will allow me flexibility on which direction the buckets can go on the shelves.


I don't have the labels available yet in my TpT store . . . but they will be coming soon. I used so much clipart making them that it's going to take some time to get all of that info put together so I can give the creators of it acknowledgements.

Next, I set to work on making the shelf dividers.


There were several series of books that I recently purchased that I didn't want to separate quite yet so I kept them together and made individual labels for them. In the picture above you can see what I'm referring to.

I was so happy with how this section of my library turned out that decided I couldn't stop there . . . so I started making more shelf markers for my Fiction sections.

All of this is available in the newest addition to my TpT store.


 Click {here} to see everything you need to give your library shelves an extreme makeover just like I did.

Wednesday, May 25, 2022

Peace Out

 Another successful year in the Media Center has come to an end.

All 13,249 books have been inventoried.

Only 19 books were unaccounted for after inventory.

There were 22 books not returned by students.

Year 3 was definitely the best yet!

I'm not going to lie . . . I've been counting down the days until summer break just like the kids have (and I imagine a few of you too). Next week I am California bound and I have a bag full of books to get started on while I lay by the pool. More to come on that soon!!!

But, before I checked out of my building this morning I had an overwhelming sadness. When I looked at this big quiet space, with the blinds all pulled down, it seemed like the {pause} button has been pushed on all the magic this space provided students and staff this school year.

Take a look for yourself . . .


Our school library ALWAYS has kids in it. Whether they are coming down to check out a new book, return books, or just say hello, it is NEVER this quiet. 

And the reason . . . is my library squad. Both of these ladies are new to their roles this year and they have absolutely rocked it! They make sure EVERY student (even the ones who are sometimes hard to love) feel loved!  

If you are like me and have a library team that you would like to give a "shout out" to please reply with a picture and the name of your school. 

Sunday, May 22, 2022

End of the Year Report

 It's hard to believe that it is already the end of another school year. As the year winds down I like to share circulation information with my administrators, teachers and parents. 


I used Microsoft Publisher to create this document. 

If you would like to have a copy just drop me an email at checkitoutwithmrsbailey@gmail.com

I used fonts from BBfonts. They are my favorites!!! If you don't have those fonts you can always choose your own.  Be warned though, it might just mess up the formatting a little bit.

So the next question is . . . where did I find all of the information for this report. And the answer is easy {DESTINY}.

PART 1: How to find the Top 10 book titles.

Go to the [REPORTS] tab and click on [LIBRARY REPORTS].


Scroll all the way to the bottom and click on [TOP/BOTTOM TITLES].


Now all you need to do is set the number of titles you would like to see and the date range.


Once I got all of this information I googled the title of each book and inserted a picture of the cover and recorded how many times each book had been circulated.

Now that I think about it I made this step harder than it had to be. I could have just clicked on each titles and seen a picture of the book cover!!! LESSON LEARNED!!!

PART 2: How to find the monthly circulation numbers.

Go to the [REPORTS] tab and click on [LIBRARY REPORTS].


Scroll all the way to the bottom and click on 
[COLLECTION STATISTICS - HISTORICAL].


Now all you need to do is choose the date range. I did mine monthly. I also made sure I just saw the [SUMMARY] and set the circulation types to [ALL CIRCULATION TYPES].


PART 3: How to find the number of new titles added to your collection.

Go to the [REPORTS] tab and click on [LIBRARY REPORTS].


Click on [TITLE & COPY LIST].


Now all you need to do is choose the date range to find out how many new copies you added during the school year. I have to admit, I was shocked when I saw how many I added.


There you have it . . . if I left something out please let me know. I hope there are a few LMS's out there that will be able to use this information